in january i started what i thought would be a fairly small “winter project” - expecting some fab delays due to Lunar NY , but with no way to predict that China would be closed in febuary, and then rest of the world in march&april ! now its almost summer and i still need to send out some prototype pcbs to testers. but im hoping to to have something you can try soon ! and meanwhile thought could document some about this project and the process so far ![]()
introducing _transcribe_ :
for midi control of panasonic video mixers
for all the details you can refer to the github repo - there i try to introduce the idea:
some people in the video-art community are performing with old hardware video-mixers such as in the Pansonic_WJ_AVE and Pansonic_WJ_MX lines. some of these mixers have a RS232 serial input for interfacing with them digitally. this is especially useful for live performance where sequencing can assist physical actions. there are some cool examples of software specifically written to interface with these mixers (such as Freds excel app and Klifs MaxPatch ) , but there are many more programs and devices that are made to interface digitally using MIDI.
the aim of this project is to create a small utility module that can transcribe MIDI , a protocol used commonly in live/performance instruments to the specific RS232 panasonic video-mixer spec , to better equip these retired workstations for their new life of glamour on stage
getting started / level-shifting
this idea (for me) came from seeing a demo of Klif’s work and talking with him at Fu:bar Festival in October ( ![]()
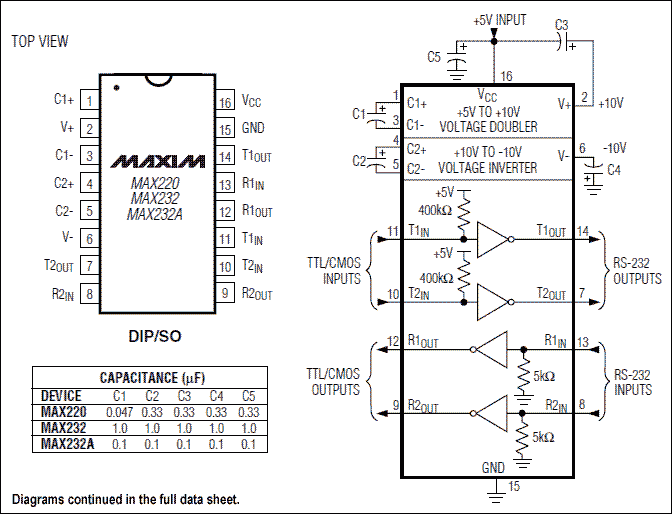
![]() @v3d & Dina ). sometime after this @autr and i spent a weekend in berlin trying to figure out the serial conversion needed to send commands from an arduino to the panasonic mixers we had. we needed to level-shift the serial from Arduino’s TTL voltages to the Panasonic’s RS232 voltages. The tidiest way i could find to do this used a max232n capacitor pump circuit - so then decided to lay out a small pcb to handle this.
@v3d & Dina ). sometime after this @autr and i spent a weekend in berlin trying to figure out the serial conversion needed to send commands from an arduino to the panasonic mixers we had. we needed to level-shift the serial from Arduino’s TTL voltages to the Panasonic’s RS232 voltages. The tidiest way i could find to do this used a max232n capacitor pump circuit - so then decided to lay out a small pcb to handle this.
midi control
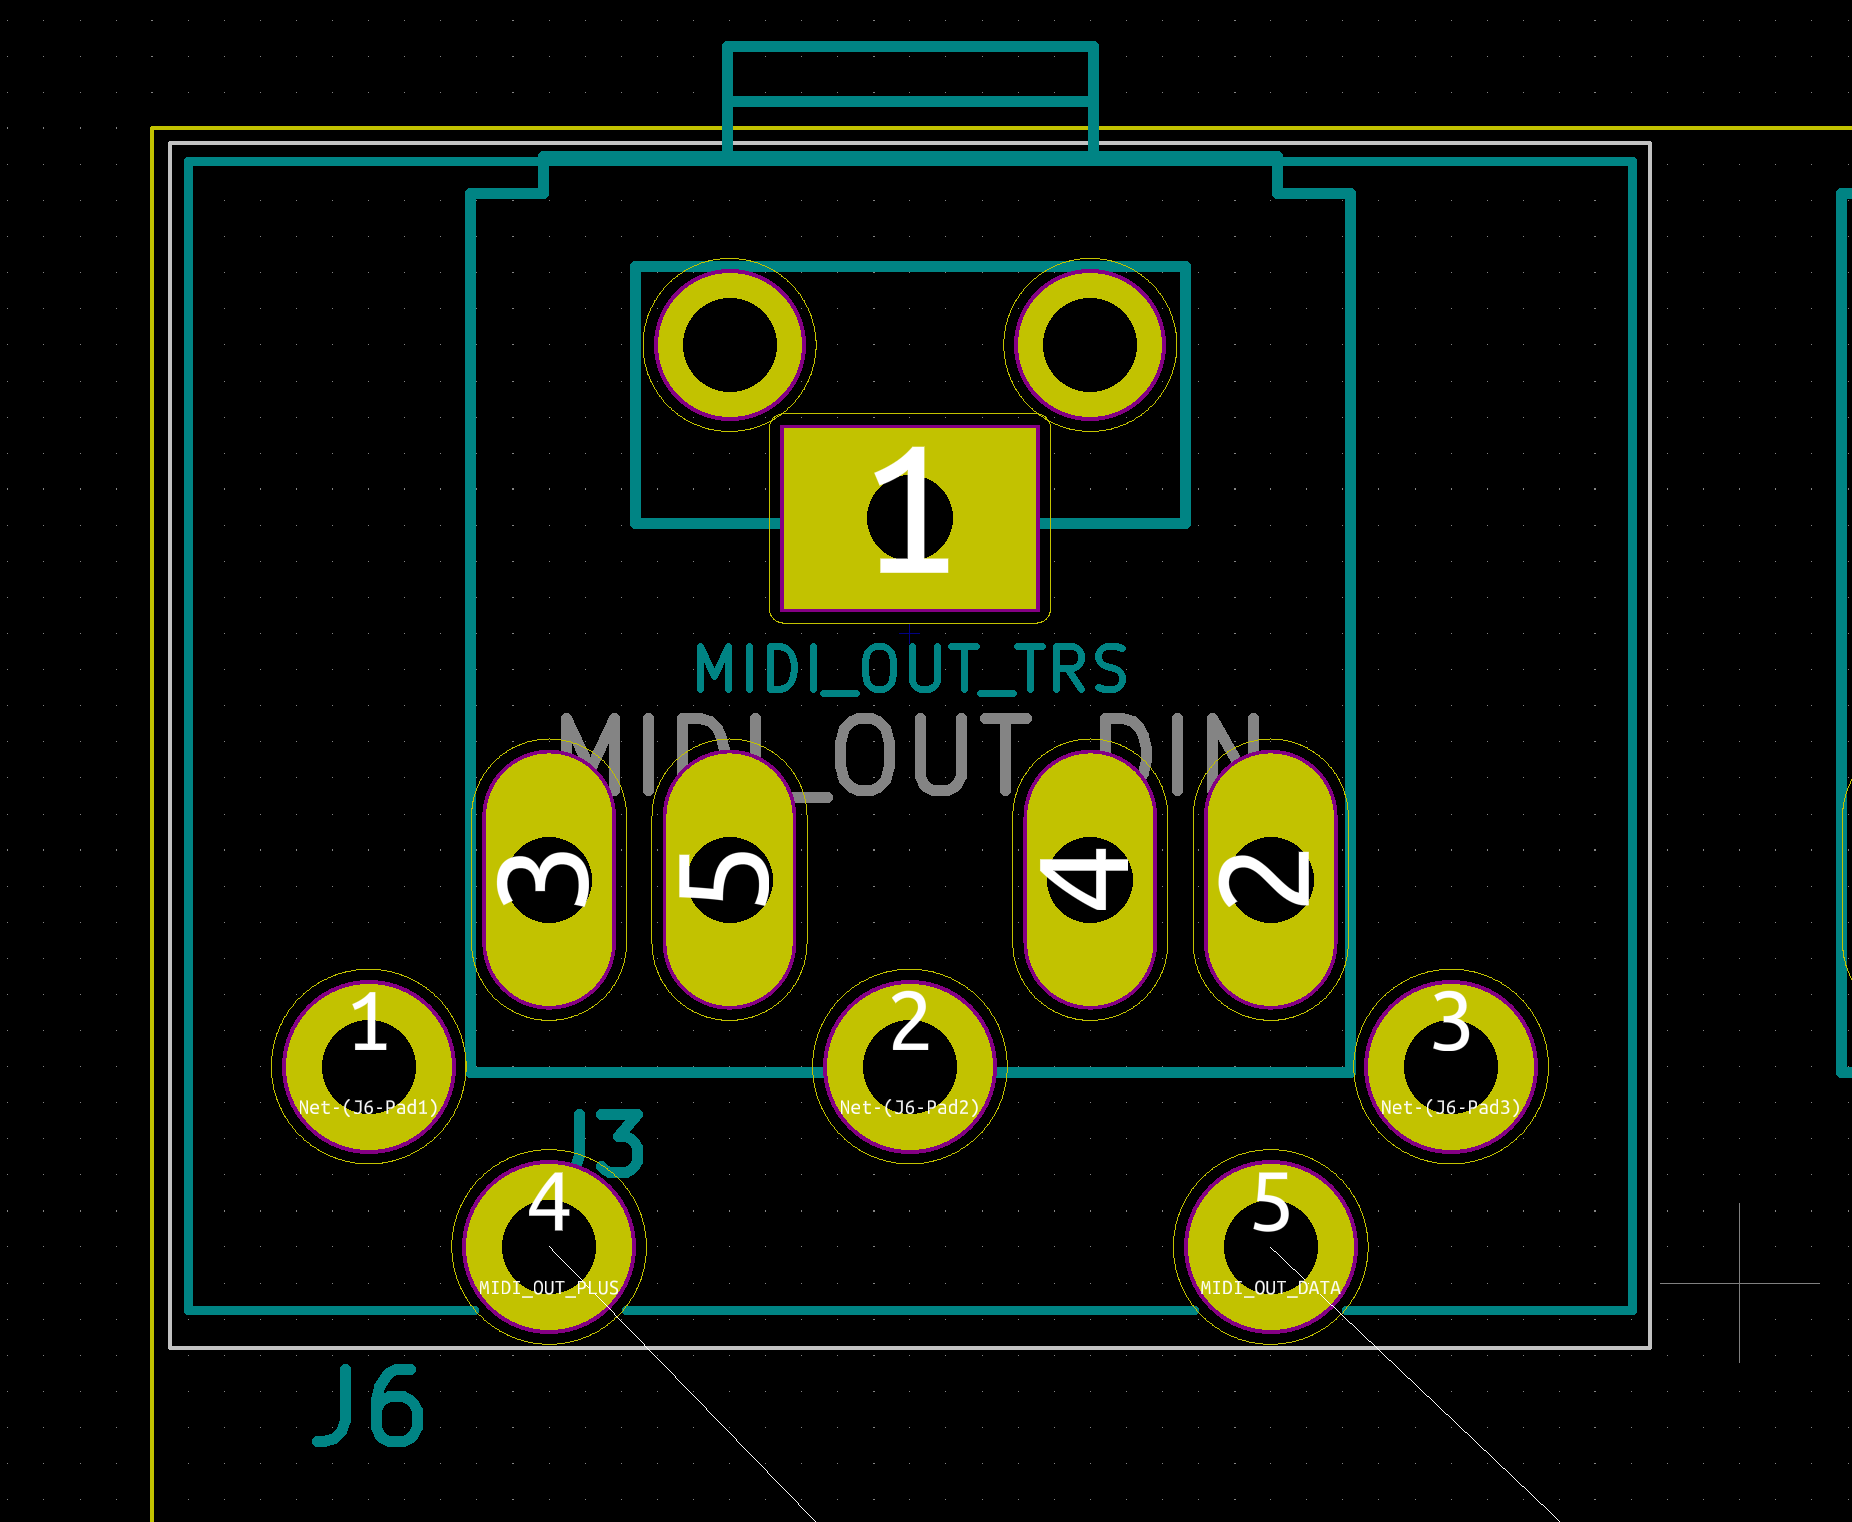
with the rs232 serial output now working i needed to decide how to receive midi messages. i had created a small opto-isolating circuit before to receive serial midi messages for recur based on the midi spec. the hardest part about this was deciding whether to use the traditional din5 midi jack footprint or the newer 3.5mm trs option. after some though i decided on a solution to please everyone:
most midi these days is sent over usb. since many arduinos have usb jacks i assumed this should be quite easy to also support. turns out usb is not so simple:
- the ATmega328P on Arduino Uno/Nano does not support usb directly - these arduinos use external circuitry to convert the usb messages to serial which is sent to the atmega.
- the ATmega32u4 (as seen on Arduino Leonardo) can act as a usb device - I decided to use the sparkfun ProMicro due to its usb capacities, its small size and its low cost. these can be configured to appear as a USB_MIDI_DEVICE when connected to a computer ( usb host )
- although sequencing from a computer is pretty cool, i also wanted to be able to control my mixer with the Korg Nanokontrol midi controller i already have.
this controller is a usb device and i discovered the usb protocol does not allow connections device-to-device or host-to-host (this is why you rarely see usb cables with the same plug-type on both ends)
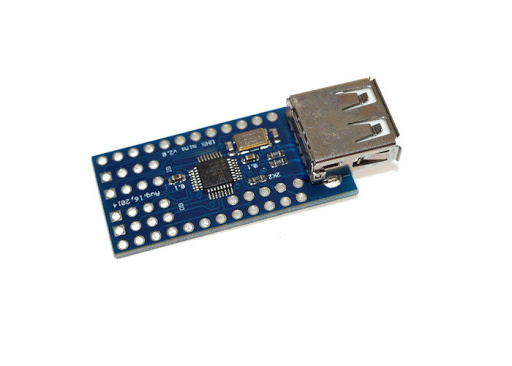
you can find arduino shields (compatible additional circuitry) based around the MAX3421E for adding usb_host features to a project. i decided on one called the Mini USB Host Shield → it seems the original creator of this shield (circuits@home?/DunioFun?) no longer exists but plenty of clones are available from ~$5 from china to ~$15 on amazon etc and a great library with midi_host examples exists. (note: a trace needs to be cut and a voltage regulator used to make this 3.3v ic work with the 5v usb/pro-micro - but the SPI data lines seemed to work fine between the host and uC)
finally i added the options to output serial midi (with buffers) and input rs232 serial too so the hardware can be reused for other purposes - the panasonic_ave55 i have takes serial on a 3.5mm TSR jack but some other mixers use the more common dsub-9 plug so both are also included here

some firmware challenges
meanwhile waiting over 2+ months for the boards to be fab’d, i started writing some code to do the transcribing. even if you are comfortable with c/c++ style languages (which im not really - cue montage of me watching youtube videos all night: what are pointers ? simple C pointers explained C Pointers - a REALLY SIMPLE explanation) embedded programming can be challenging:
- you are lucky if things that break bother to tell you - more likely the program compiles and runs but then just starts acting different or all weird out of nowhere !
- no real debugger - i ended up using serial print lines on almost every line just to stay sane
- really limited space compared to coding for computers (both memory available for the program and the size of the compiled code itself )
- (for me) writing ‘nice’ code and functional code seemed to conflict more often here (than in python at least!) - im still learning, hope to improve this
- arduinoIDE is not a real ide - i recommend VisualStudioCode if you are looking for something. at first i used the arduino vscode extension, but now have switched to using PlatformIO - maybe i will make another topic about this but just say i am happy with it so far
- finding a middle ground between providing a fixed out-of-the-box mapping, with no extra coding required, and empowering users to easily create their own non-standard maps.
- the pro-micro has an annoying problem where it sometimes just stops receiving new code uploads. theres some combinations of reset pins, bootloader modes and perfect timing that supposedly unlocks them again - but in the end i found it much easier just to use another arduino to reburn the bootloader onto the pro-micro whenever this happens - only takes a moment and fixes it every time

an example of space restraints and ‘not-so-nice’ code:
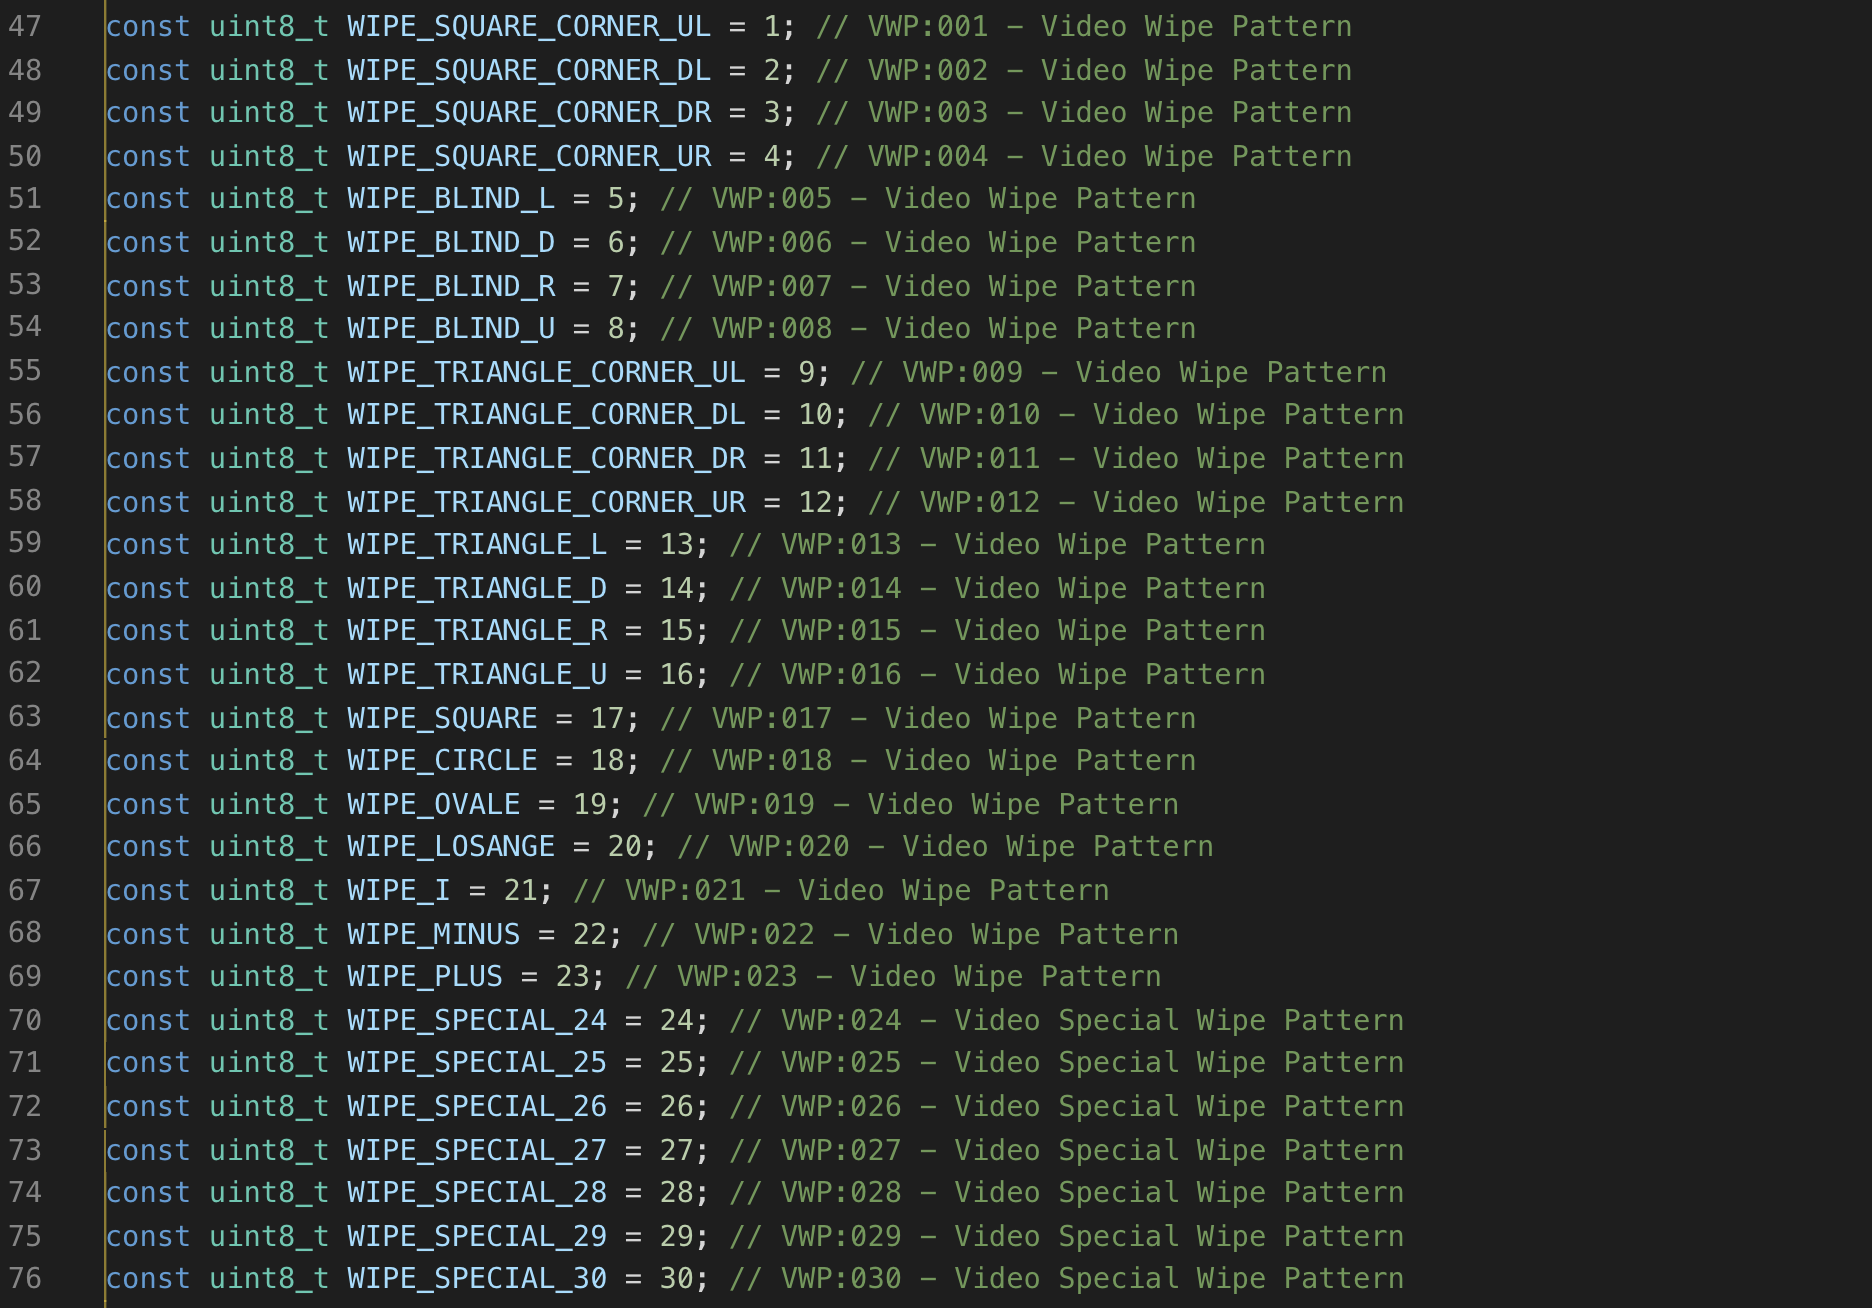
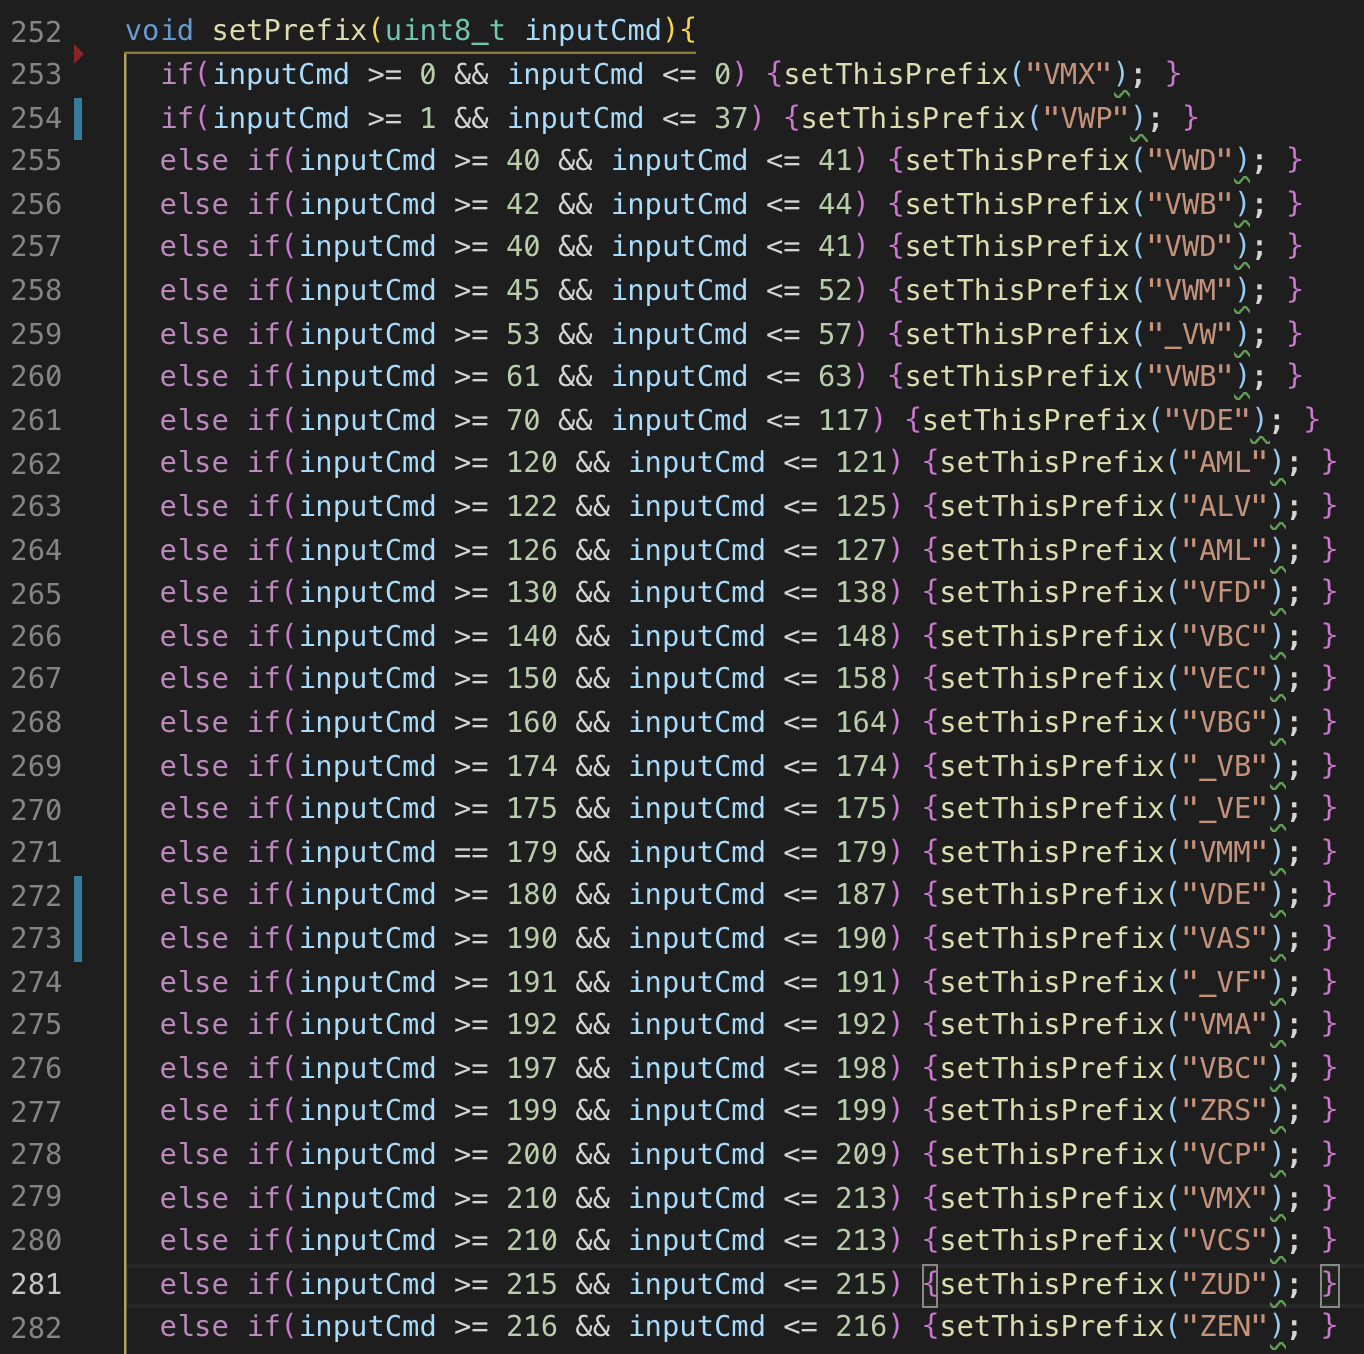
to change the wipe mode (WIPE_SQUARE_CORNER_UL) you need to send the mixer this command VWP:001. there are quite a lot of different commands (~200 or so). forget about strings and their self managed / dynamic length. even by specifically declaring constant char arrays of size 7, when you need 200 of these most of the space available (ram/flash) is full. a hack i tried that helped was replacing these char arrays with a single 8bit integer, and then in the main loop infer what the prefix should be with a giant if/else block (this works because each number is unique)
in hindsight maybe it would work better to define these commands using pre-compiler flags (#define WIPE_SQUARE_CORNER_UL "VWP:001") ![]() but yes just an example of the kind of challenges that can arise from seemingly simple ideas…
but yes just an example of the kind of challenges that can arise from seemingly simple ideas…
another example is the commands that takes multiple parameters as inputs. (for example scene_select which has an x and y component, or the chromakey_select which takes r g and b ) midi doesnt have inputs with multiple params so these need to be split between difference cc channels (eg cc0 for x_position, cc1 for y_position ) but for this to work the current x and y positions need to be stored in the program (so an input on cc0 or cc1 knows where to place x and y). there is a temptation to over-engineer a solution that works for all cases but in reality there is only a few of these multi-param exceptions and it was much simpler to hard code the additional logic just for these cases.
in spite of these challenges and more the firmware is in a usable state that i am happy to share for an initial round. i want some feedback from people using it to help inform what to change for the next iteration.
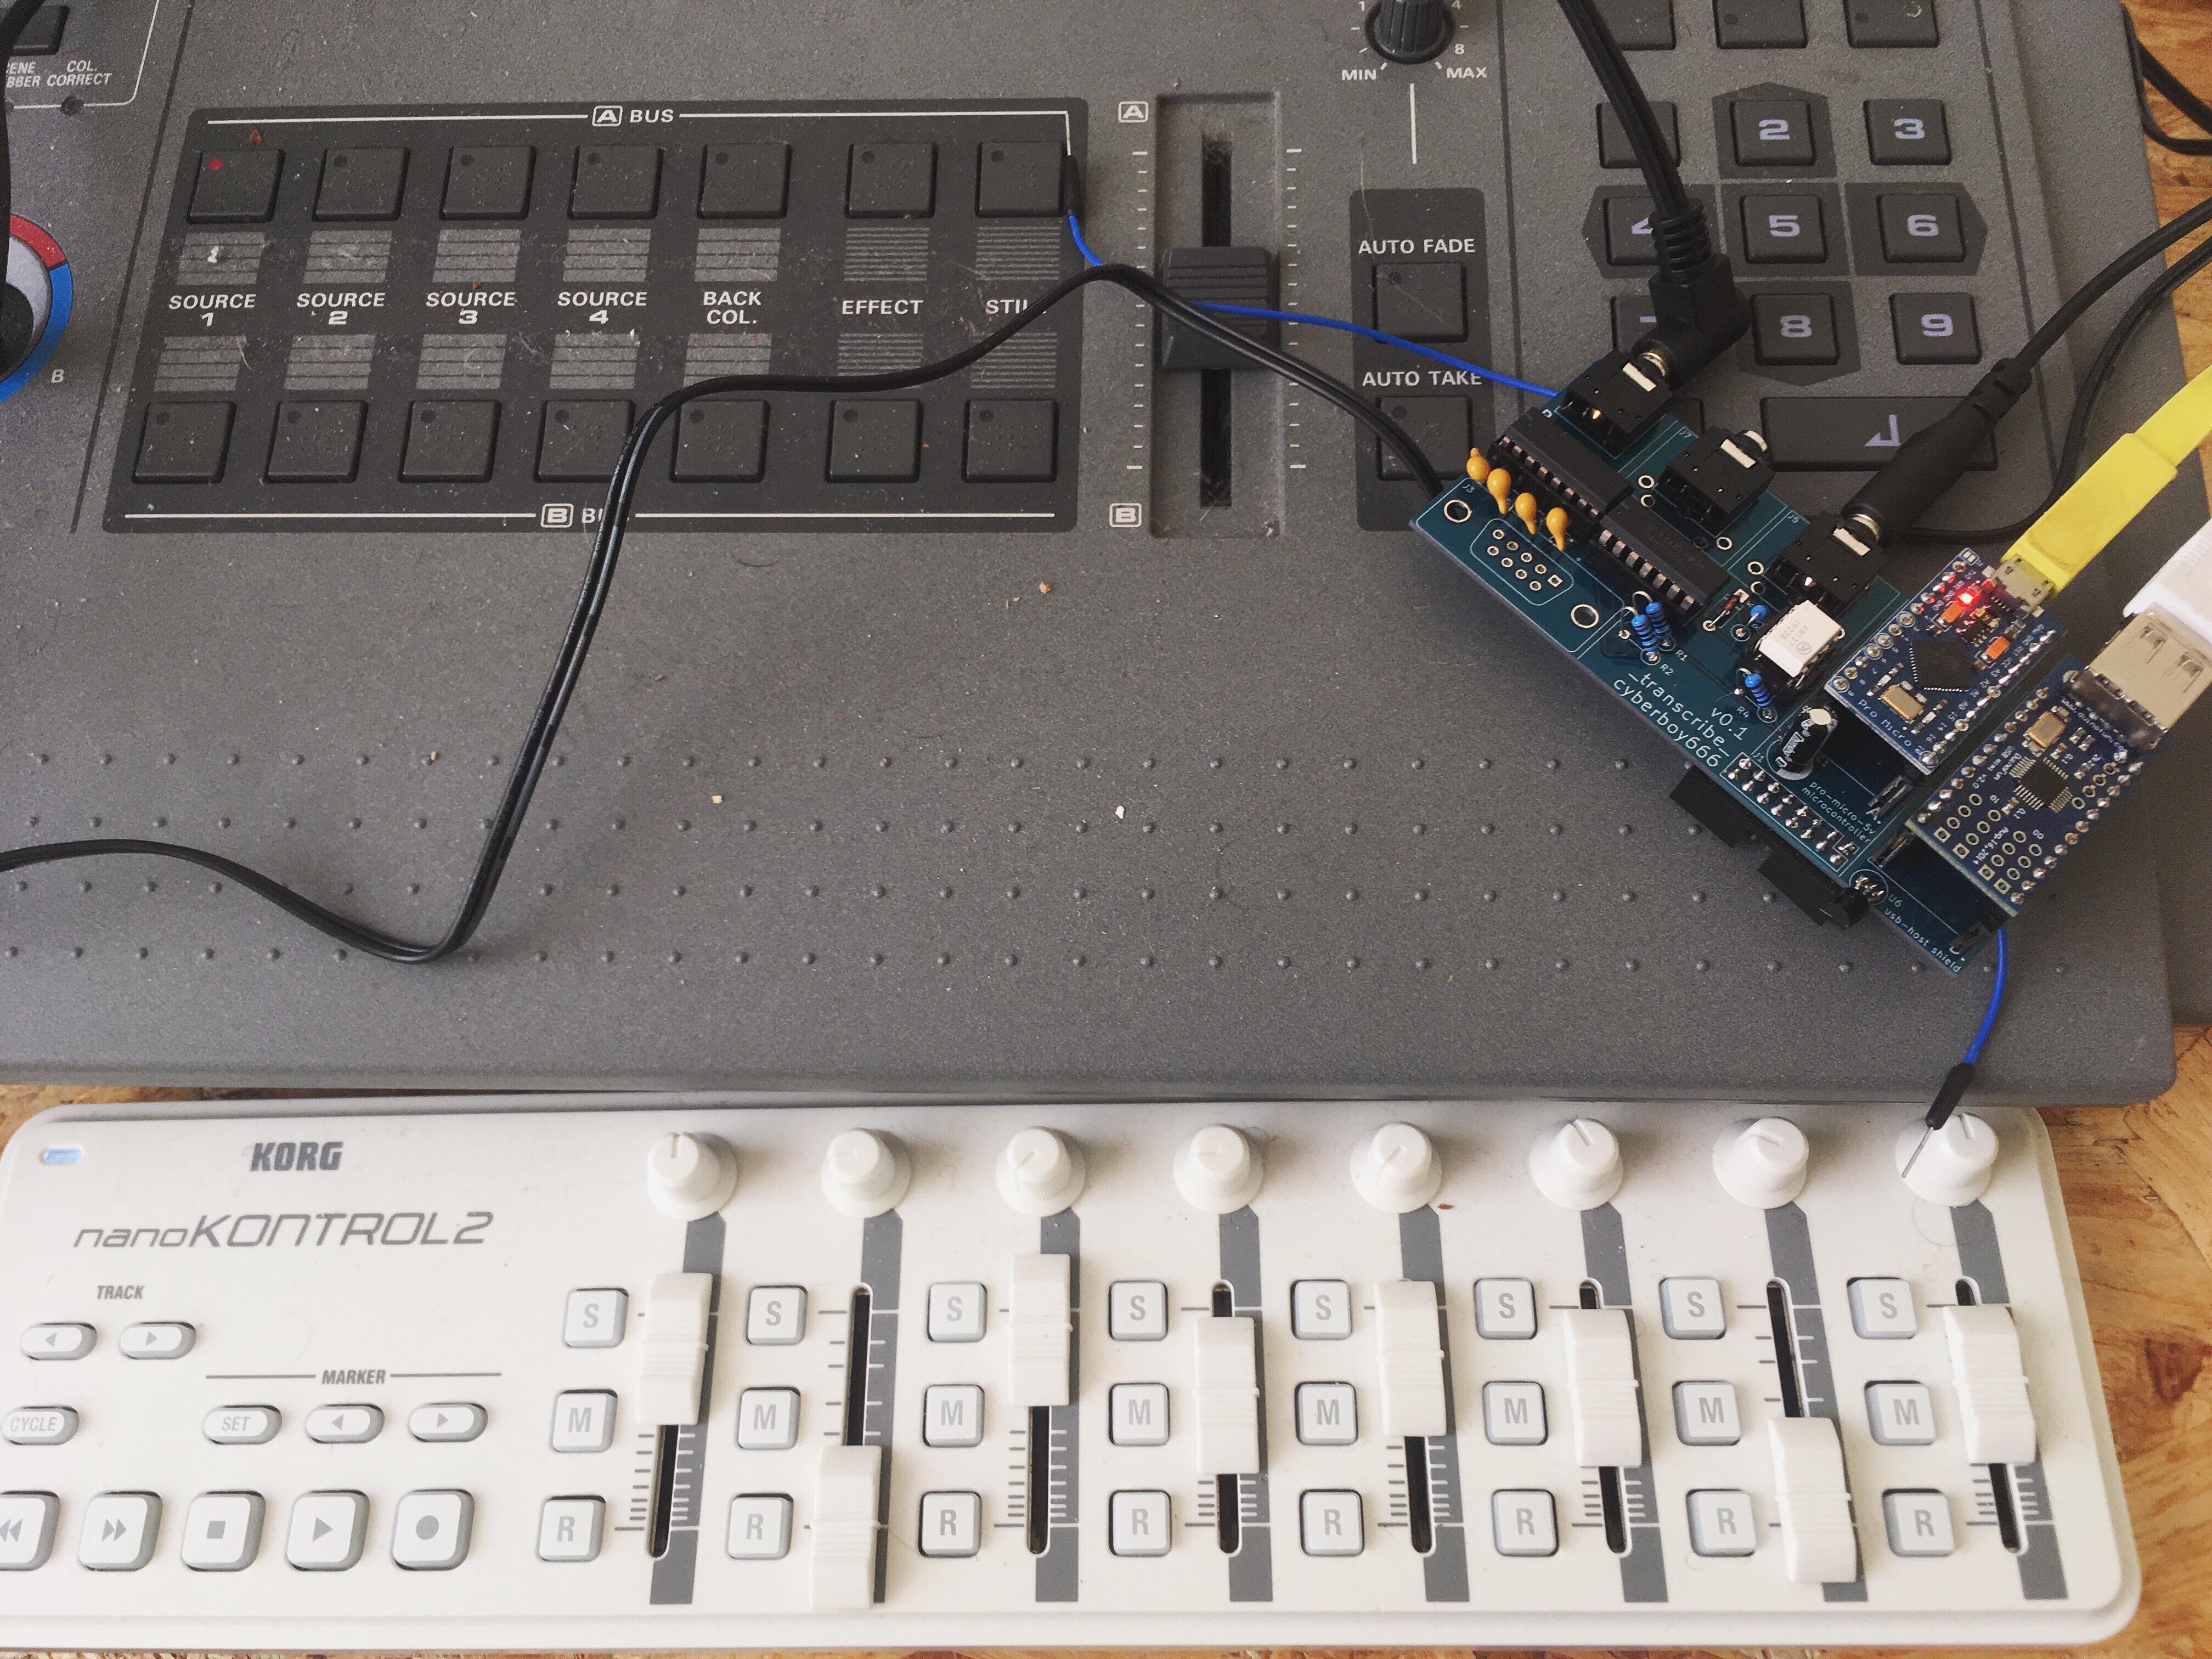
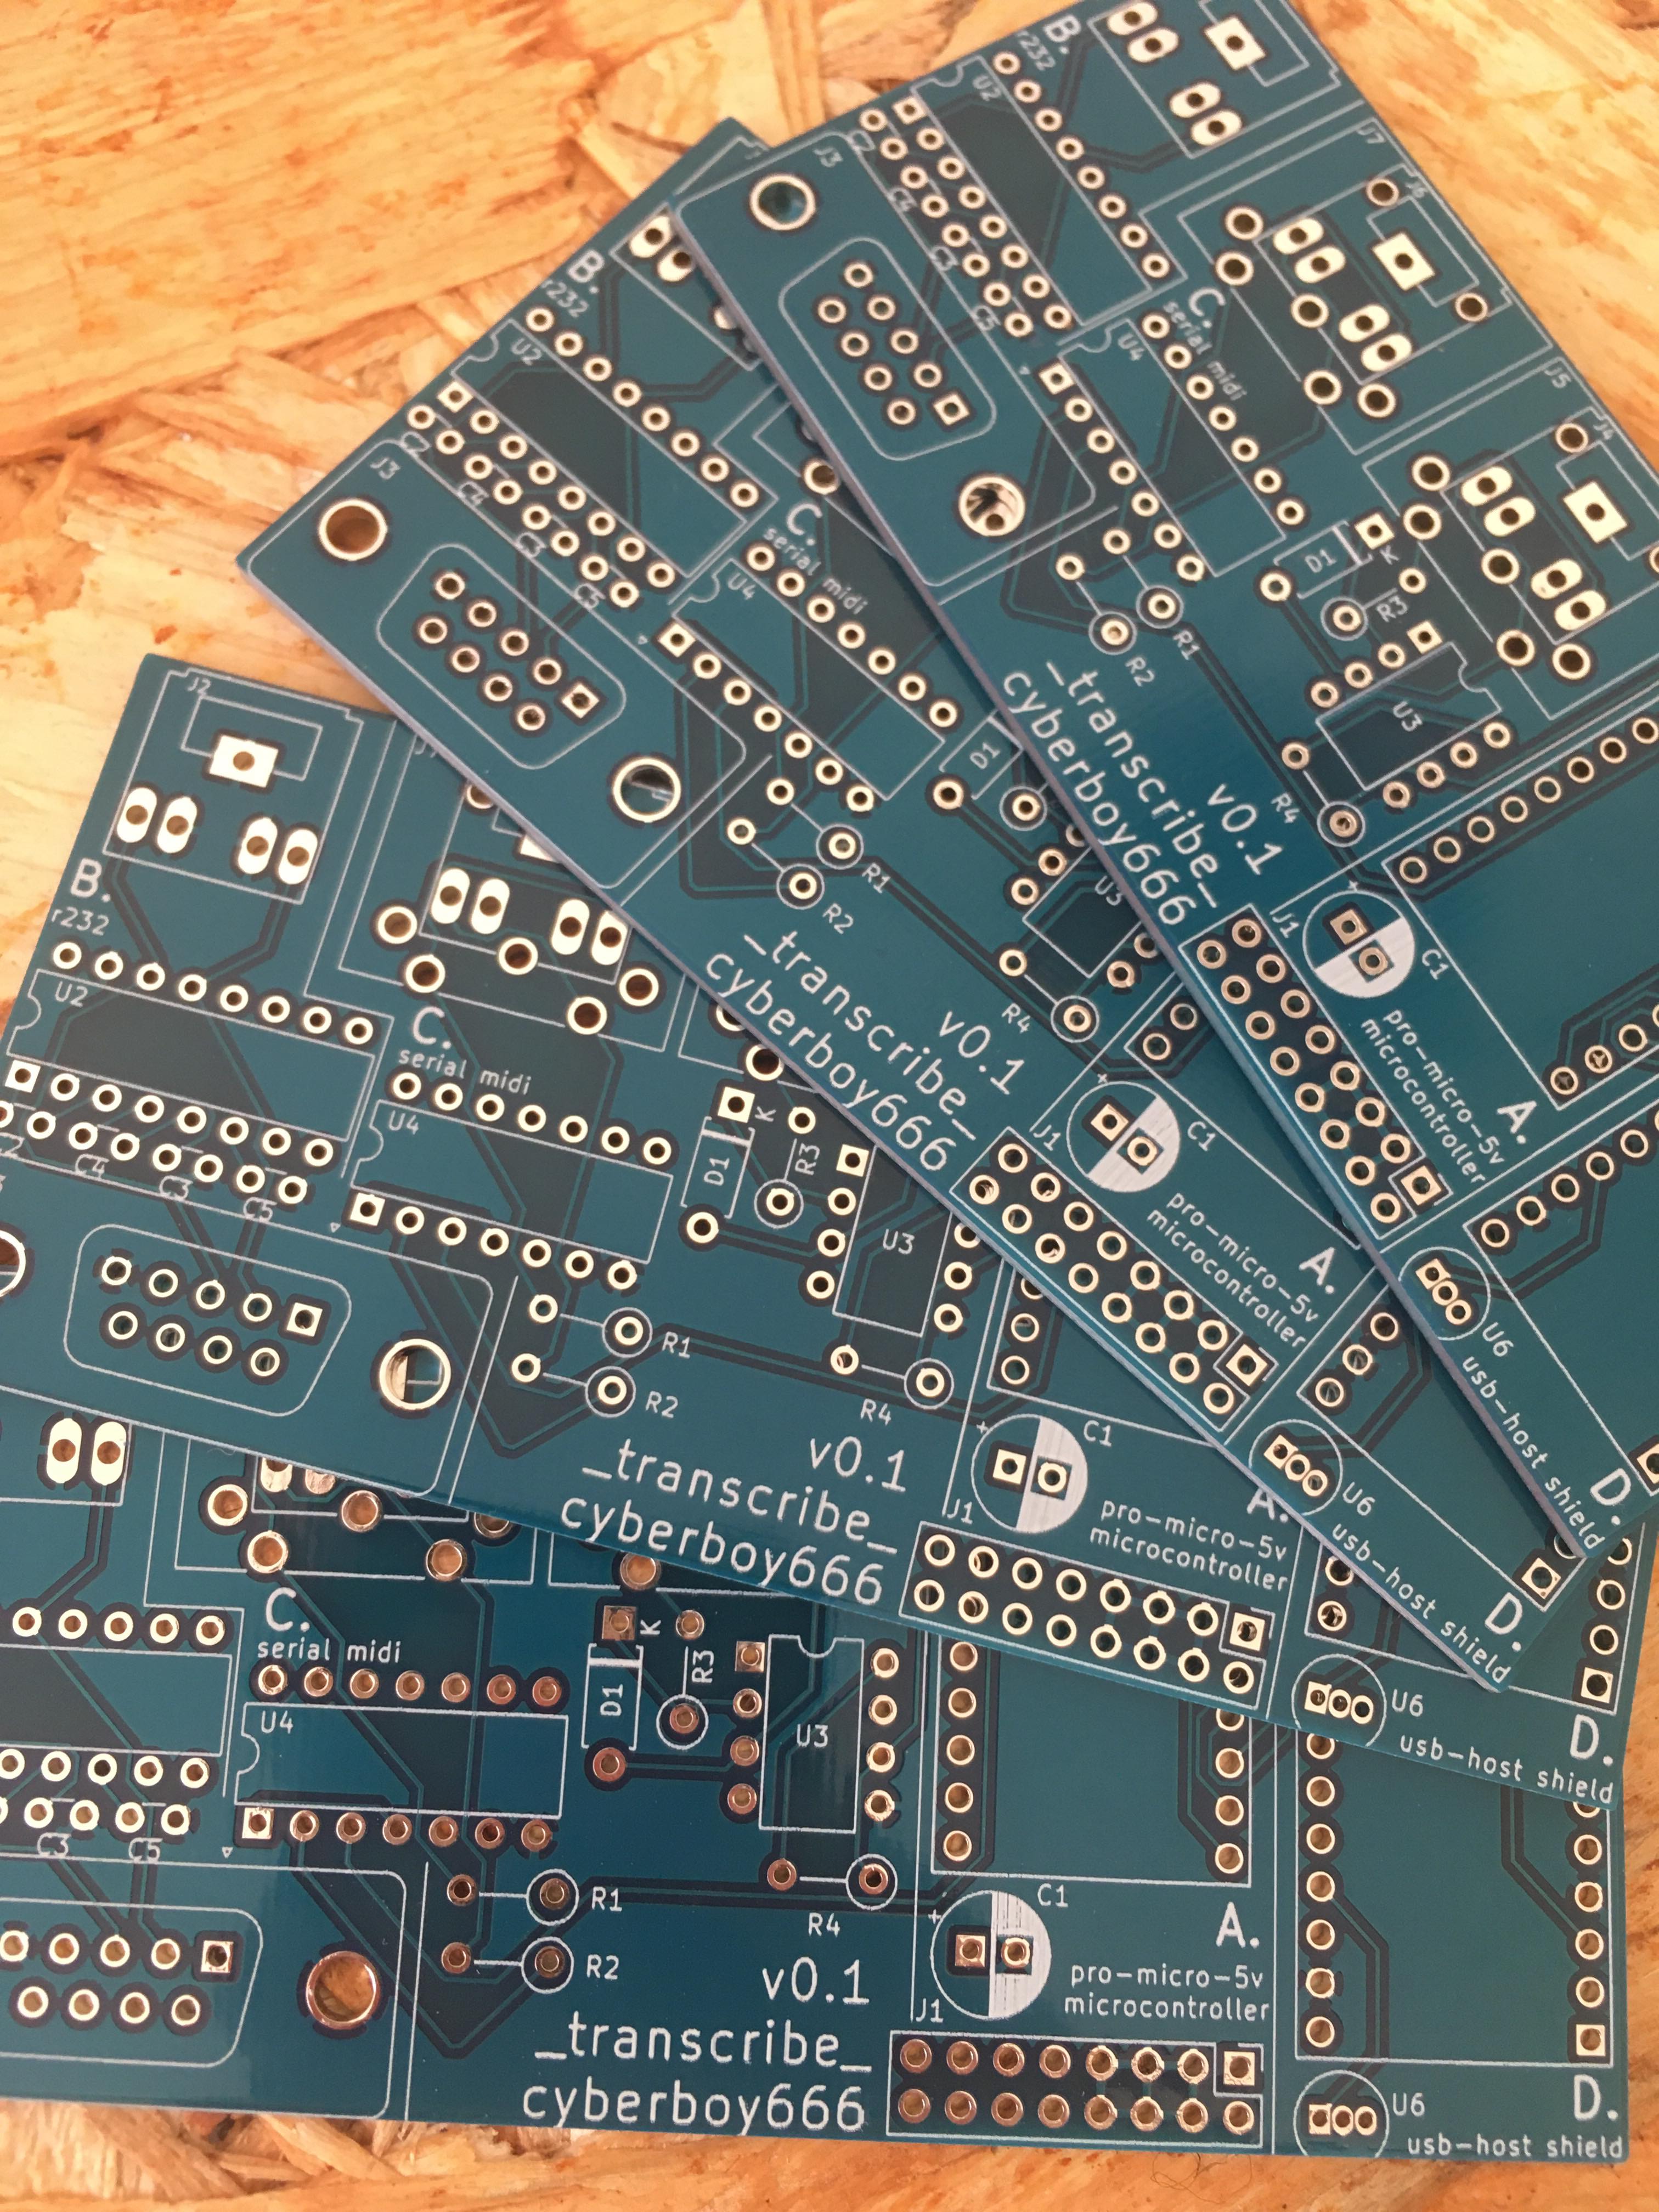
v0.1 pcbs
finally got a few prototype pcbs. there are some small improvements i need to make but these are mostly working. i will update here (and elsewhere - im cyberboy666 on instagram too) when i have the v0.2 board tested incase anyone wants to try building it or eventually getting some kits or something from me
small video example:
here is a test using ableton to sequence x_select, y_select and mix_amount to some music. i will make a better demo for this when i find time

note: not all panasonic video mixers have serial control. mx10, mx12 and ave5 are too old i think. to sequence them with midi would require modifications to the circuit itself


