Lesson 1 - Comparators
Lesson 2 - Clamping
Lesson 3 - Sync
Lesson 4 - Power IN to the breadboard
Lesson 5 - OP AMPS
Lesson 6 - BLANKING (finally)
Lesson 7 - circuit output section
Lesson 8 - Let’s wrap it up!
Additional material:
video clamp demo
Breadboard - Input Section
Adjusting Horizontal Blanking
Luminance Inverter circuit complete!!
12 Likes
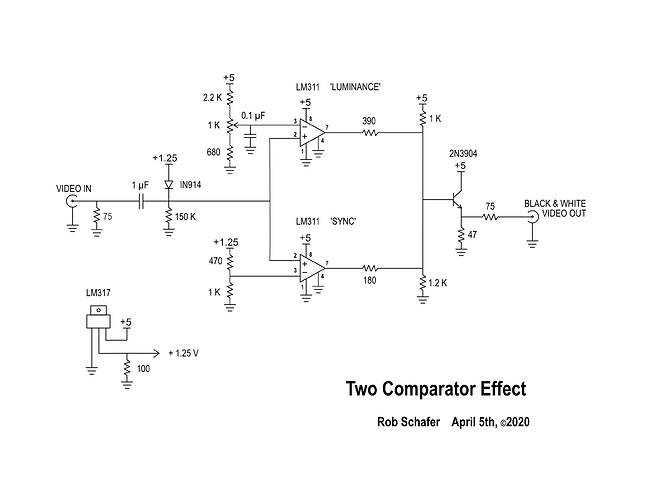
Here is the schematic (drawn beautifully by my friend Tom Nelson)
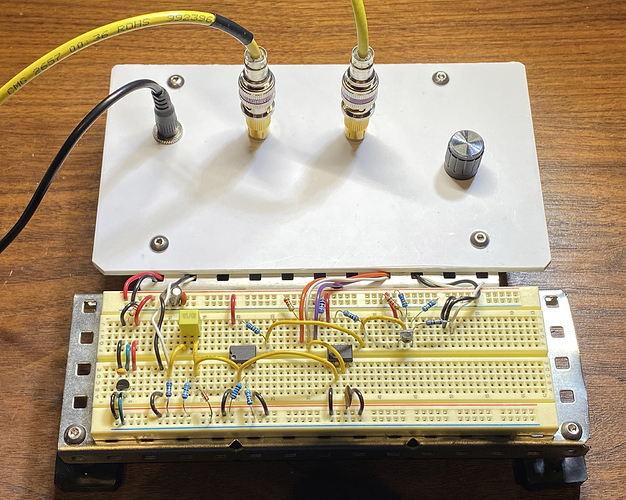
And an image of the final Two Comparator Effect circuit.
3 Likes
thankyou so much for sharing these - might get me over my fear of electricity! You have a great teaching style 
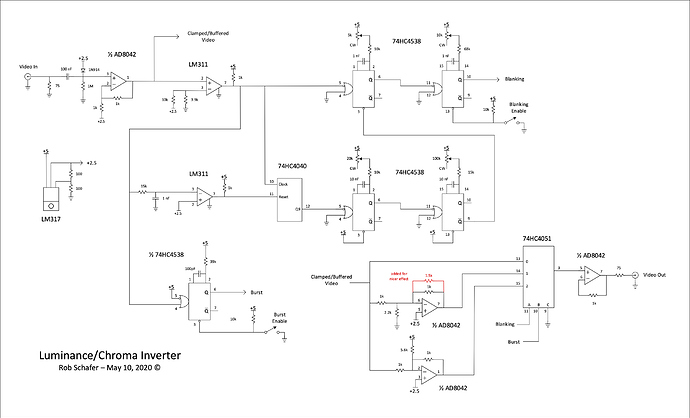
Here’s the final, full schematic of my Luminance/Chroma Inverter.
3 Likes
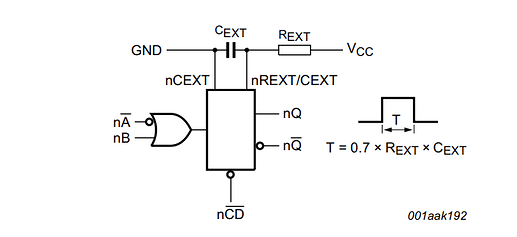
hi @schaferob - just one small question re this schematic - should the Rx/Cx pins on the one-shots also connect to ground ? like in this diagram from the datasheet ? (or is this implicit/internal somehow ? )
I never tie it to ground so it must be connected internally. Any chance that’s the info for the CD4538? (Should be the same but I know the old CMOS version could run at 18 volts!)
2 Likes
Lesson 10 - POWER supplies
6 Likes
what happend to these videos @schaferob ?
update - re-found your channel. thanks again for these videos!


