Graphviz is a wonderful addition to the scanlines forum that is finally working!
This will allow us to make all kinds of patch/signal flow diagrams
lets step through some techniques
Basics
so first of all you can easily connect objects to each other with graphviz but we need to start with a blank slate. Lets say the header and foot we will work on filling in the body.
 [graphviz engine=dot]
        digraph structs {node [shape=record];
        {

         (module connections go here)

        }}
     [/graphviz]
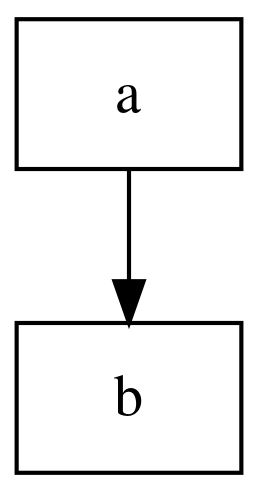
now something as simple as
a → b
will get you started patching
[graphviz engine=dot]
    digraph structs {node [shape=record];
    {
    a -> b
    }}
 [/graphviz]
if you want to connect one module to more than one module at a time just use a comma to separate the module.
[graphviz engine=dot]
    digraph structs {node [shape=record];
    {
    a -> b
    b -> c,a
    }}
 [/graphviz]

This works in the other direction too where you can connect more than one module to one.
[graphviz engine=dot]
        digraph structs {node [shape=record];
        {
        a -> b
        b -> c,a
        d,e -> b
        }}
     [/graphviz]

You can also color the patch connections easily by just adding [color=green] to the end.
[graphviz engine=dot]
digraph structs {node [shape=record];
{
a -> b
b -> c,a
d,e -> b
c -> a [color=green]
}}
[/graphviz]

you don’t have to use letters you could use module names like doorway.
[graphviz engine=dot]
digraph structs {node [shape=record];
{
a -> b
b -> c,a
d,e -> b
c -> a [color=green]
b -> doorway
}}
[/graphviz]

if you want to label your connections use [label=“channel 1”] after the connection
[graphviz engine=dot]
digraph structs {node [shape=record];
{
a -> b
b -> c,a
d,e -> b
c -> a [color=green]
b -> doorway
doorway -> vc [label="channel 1"]
}}
[/graphviz]

you can also write a longer single line patch as below.
[graphviz engine=dot]
digraph structs {node [shape=record];
{
a,b -> c -> b -> passage, doorway, prismatic -> mixer
}}
[/graphviz]

Advanced
IN THE EXAMPLES BELOW I AM ONLY COPYING THE BODY NOT THE HEADER AND FOOT.
one thing you may want to do is make structures instead of just a single node which will better represent modules.
a -> passage
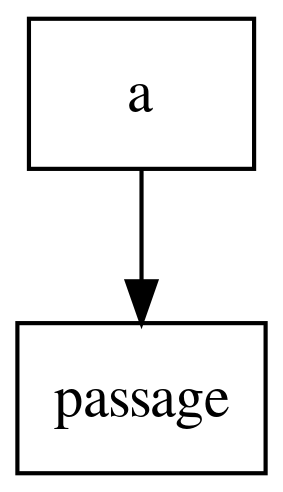
there are many inputs and outputs to a passage module so while a simple node may work for some signal flow diagrams it won’t for others.
a -> passage

passage [label="Passage |
{ 1 | 2 | 3}"];

you can see that we are just adding a definition for “passage” here under the connection . Within the [label] we add “|” lines to separate parts and sections go in “{ }” brackets.
so this is helpful and gives us some inputs or outputs but for the way I prefer laying things out inputs should be on the top and outputs on the bottom so this won’t work.
a -> passage

passage [label="Passage |{
{1 | 2 | 3} }"];

If we add an additional set of “{}” brackets within passage you can change the orientation of the sections.
a -> passage

passage [label="Passage |{
{ {In 1 | 2 | 3 | Thru 1 | 2 | 3} }"];

Now we can add in the correct labels for our input section.
We also need to add a section on the output now.
a -> passage

passage [label="Passage |{
{In 1 | 2 | 3 | Thru 1 | 2 | 3} |
{Out 1 | 2 | 3} }"];

so as you can see we added another “|” line and then another section within “{}” brackets. This gives us an input and output section.
We are also going to want to be able to send connections directly to specific parts of each module so we need to label the parts. Add “<>” before the parts in each section to indicated the label to that part. Then instead of a connection saying “a → passage” we can instead specify “a → passage:tr” for the Thru R input.
I’m using ri,gi,bi,tr,tg,tb,ro,go,bo to label passage
“RGB” throughout
“i” for ins
“o” for outs
“t” for the Thru ins
a -> passage:tr

passage [label="Passage |{
{ <ri> In 1 | <gi> 2 | <bi> 3 | <tr> Thru 1 | <tg> 2 | <tb> 3} |
{ <ro> Out 1 | <go> 2 | <bo> 3} } } "];

Now if we add this passage definition to the last patch from the basic section we get this
a,b -> c -> b -> passage, doorway, prismatic -> mixer

passage [label="Passage |{
{ <ri> In 1 | <gi> 2 | <bi> 3 | <tr> Thru 1 | <tg> 2 | <tb> 3} |
{ <ro> Out 1 | <go> 2 | <bo> 3} } } "];

Here we add a doorway definition to the previous patch.
a,b -> c -> b -> passage, doorway, prismatic -> mixer

passage [label="Passage |{
{ <ri> In 1 | <gi> 2 | <bi> 3 | <tr> Thru 1 | <tg> 2 | <tb> 3} |
{ <ro> Out 1 | <go> 2 | <bo> 3} } } "];

doorway [label="Doorway|{
{ <t> Threshold | <s> Source | <g> Gain | <b> Background | <f> Foreground}|
{ <k> Key } }  } "];

so if we take away the connections from before and make some of our own now that we have a couple modules we can do some fun stuff like this. I’ve added a second doorway by just changing the label slightly
doorway:k -> Mult_K -> passage:ri,passage:gi,passage:bi,doorway2:s
passage:ro,passage:go,passage:bo -> mixer
doorway2:k -> mixer
doorway2:k -> mult_k2 -> passage:tr,passage:tg,passage:tb


passage [label="Passage |{
{ <ri> In 1 | <gi> 2 | <bi> 3 | <tr> Thru 1 | <tg> 2 | <tb> 3} |
{ <ro> Out 1 | <go> 2 | <bo> 3} } } "];

doorway [label="Doorway|{
{ <t> Threshold | <s> Source | <g> Gain | <b> Background | <f> Foreground}|
{ <k> Key } }  } "];

doorway2 [label="Doorway2|{
{ <t> Threshold | <s> Source | <g> Gain | <b> Background | <f> Foreground}|
{ <k> Key } }  } "];

Patches
to see a LOT more patch visualizations check out the Patch dissection link at the bottom of this post

code
memory:ro -> polar:ri [color = red]
memory:go -> polar:gi [color = green]
memory:bo -> polar:bi [color = blue]

polar:ro -> passage:tr [color = red]
polar:go -> passage:tg [color = green]
polar:bo -> passage:tb [color = blue]

passage:ro -> visual:br [color = red]
passage:go -> visual:bg [color = green]
passage:bo -> visual:bb [color = blue]

memory:yo -> mult_y
mult_y -> arch:a

polar:nk -> mult_neg
polar:pk -> mult_pos

mult_pos, mult_neg -> switch
switch -> arch:b

arch:i -> mapper:s
arch:c -> mapper:y
mult_y -> mapper:h

mapper:ro -> matrix:ri [color = red]
mapper:go -> matrix:gi [color = green]
mapper:bo -> matrix:bi [color = blue]

matrix:ro -> visual:ar [color = red]
matrix:go -> visual:ag [color = green]
matrix:bo -> visual:ab [color = blue]

arch:xor -> rect_out
rect_in -> arch:r
arch:m -> matrix:inv

mult_y -> doorway:s
doorway:k -> visual:color

mult_pos -> arch:g
arch:l -> visual:comp


memory [label="Memory\nPalace |{
{<ai> A | <ri> R | <gi> G | <bi> B} |
{<yo> Y | <ro> R | <go> G | <bo> B} } "];

polar [label="Polar\nFringe |{
{ <ri> R | <gi> G | <bi> B} |
{ <ro> R | <go> G | <bo> B} } |{
{ <pk> Pos Key | <nk> Neg Key}} "]

passage [label="Passage |{
{ <tr> Thru 1 | <tg> 2 | <tb> 3} |
{ <ro> Out 1 | <go> 2 | <bo> 3} } } "];

visual [label="Visual\nCortex |{
{ <ar> A R | <ag> G | <ab> B | <br> B R | <bg> G | <bb> B | <color> Colorize | <comp> Composite }|
{ <comvo> Component} }  } "];

arch [label="Arch|{
{ <a> Logic A | <b> B | <r> Rectifier | <g> Gamma}|
{ <xor> XOR | <i> Intersection | <c> Clip | <l> Log | <m> Mirror } }  } "];

mapper [label="Mapper|{
{ <h> Hue | <s> Saturation | <y> Y Brightness}|
{ <yo> Y | <uo> U | <vo> V | <ro> R | <go> G | <bo> B} }  } "];

matrix [label="Matrix\nMixer|{
{ <ri> R | <gi> G | <bi> B | <inv> INV}|
{ <ro> R | <go> G | <bo> B} }  } "];

doorway [label="Doorway|{
{ <s> Source }|
{ <k> Key } }  } "];

code
audio -> sensory:audio
sensory:a -> slew:ai
sensory:b -> slew:bi
sensory:c -> slew:ci
sensory:d -> slew:di
sensory:e -> memory_zoom

slew:ao -> mult_A
slew:bo -> mult_B
slew:co -> mult_C
slew:do -> mult_D

mult_A -> passage_r, polar_y, polar_fringe
mult_B -> passage_g, memory_x, memory_hue
mult_C -> passage_b, memory_y, memory_cont
mult_D -> polar_x,  memory_rot, polar_diam


sensory [label="Sensory\nTranslator|{
{ <audio> Audio}|
{ <a> A | <b> B | <c> C | <d> D | <e> E } }  } "];

slew [label="Quad\nSlew|{
{ <ai> A | <bi> B | <ci> C | <di> D}|
{ <ao> A | <bo> B | <co> C | <do> D} }  } "];

code
 struct1 [shape=record,label= "Visual\nCortex  |  <h> H | <v> V|  <hmv> H-V |<hpv> H+V"];
 struct2 [shape=record,label=" Comparators | <1> one| <2> two "];
 struct3 [shape=record,label="Memory\nPalace | { { <a> A |<r> R|<g> G|<b> B}| CV\nInputs }  "];


 struct1:h -> struct2:1
 struct1:v -> struct2:2


struct1:hmv -> Mixer
struct2:1 -> Mixer;
struct2:2 -> Mixer;


Mixer -> "2:1 switch"
struct1:hpv -> "2:1 switch"

"2:1 switch" -> Doorway


Doorway -> MULT


 MULT -> struct3: a
 MULT -> struct3: r
todo:
add section after advanced about visualizing knob settings
rename advanced section to creating modules